Quick Guide: SYBR® Safe DNA Stain

What is SYBR® Safe DNA Stain?

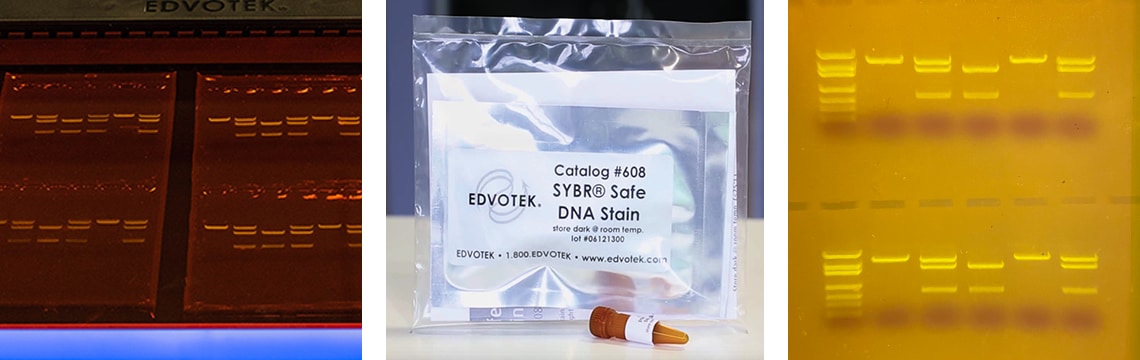
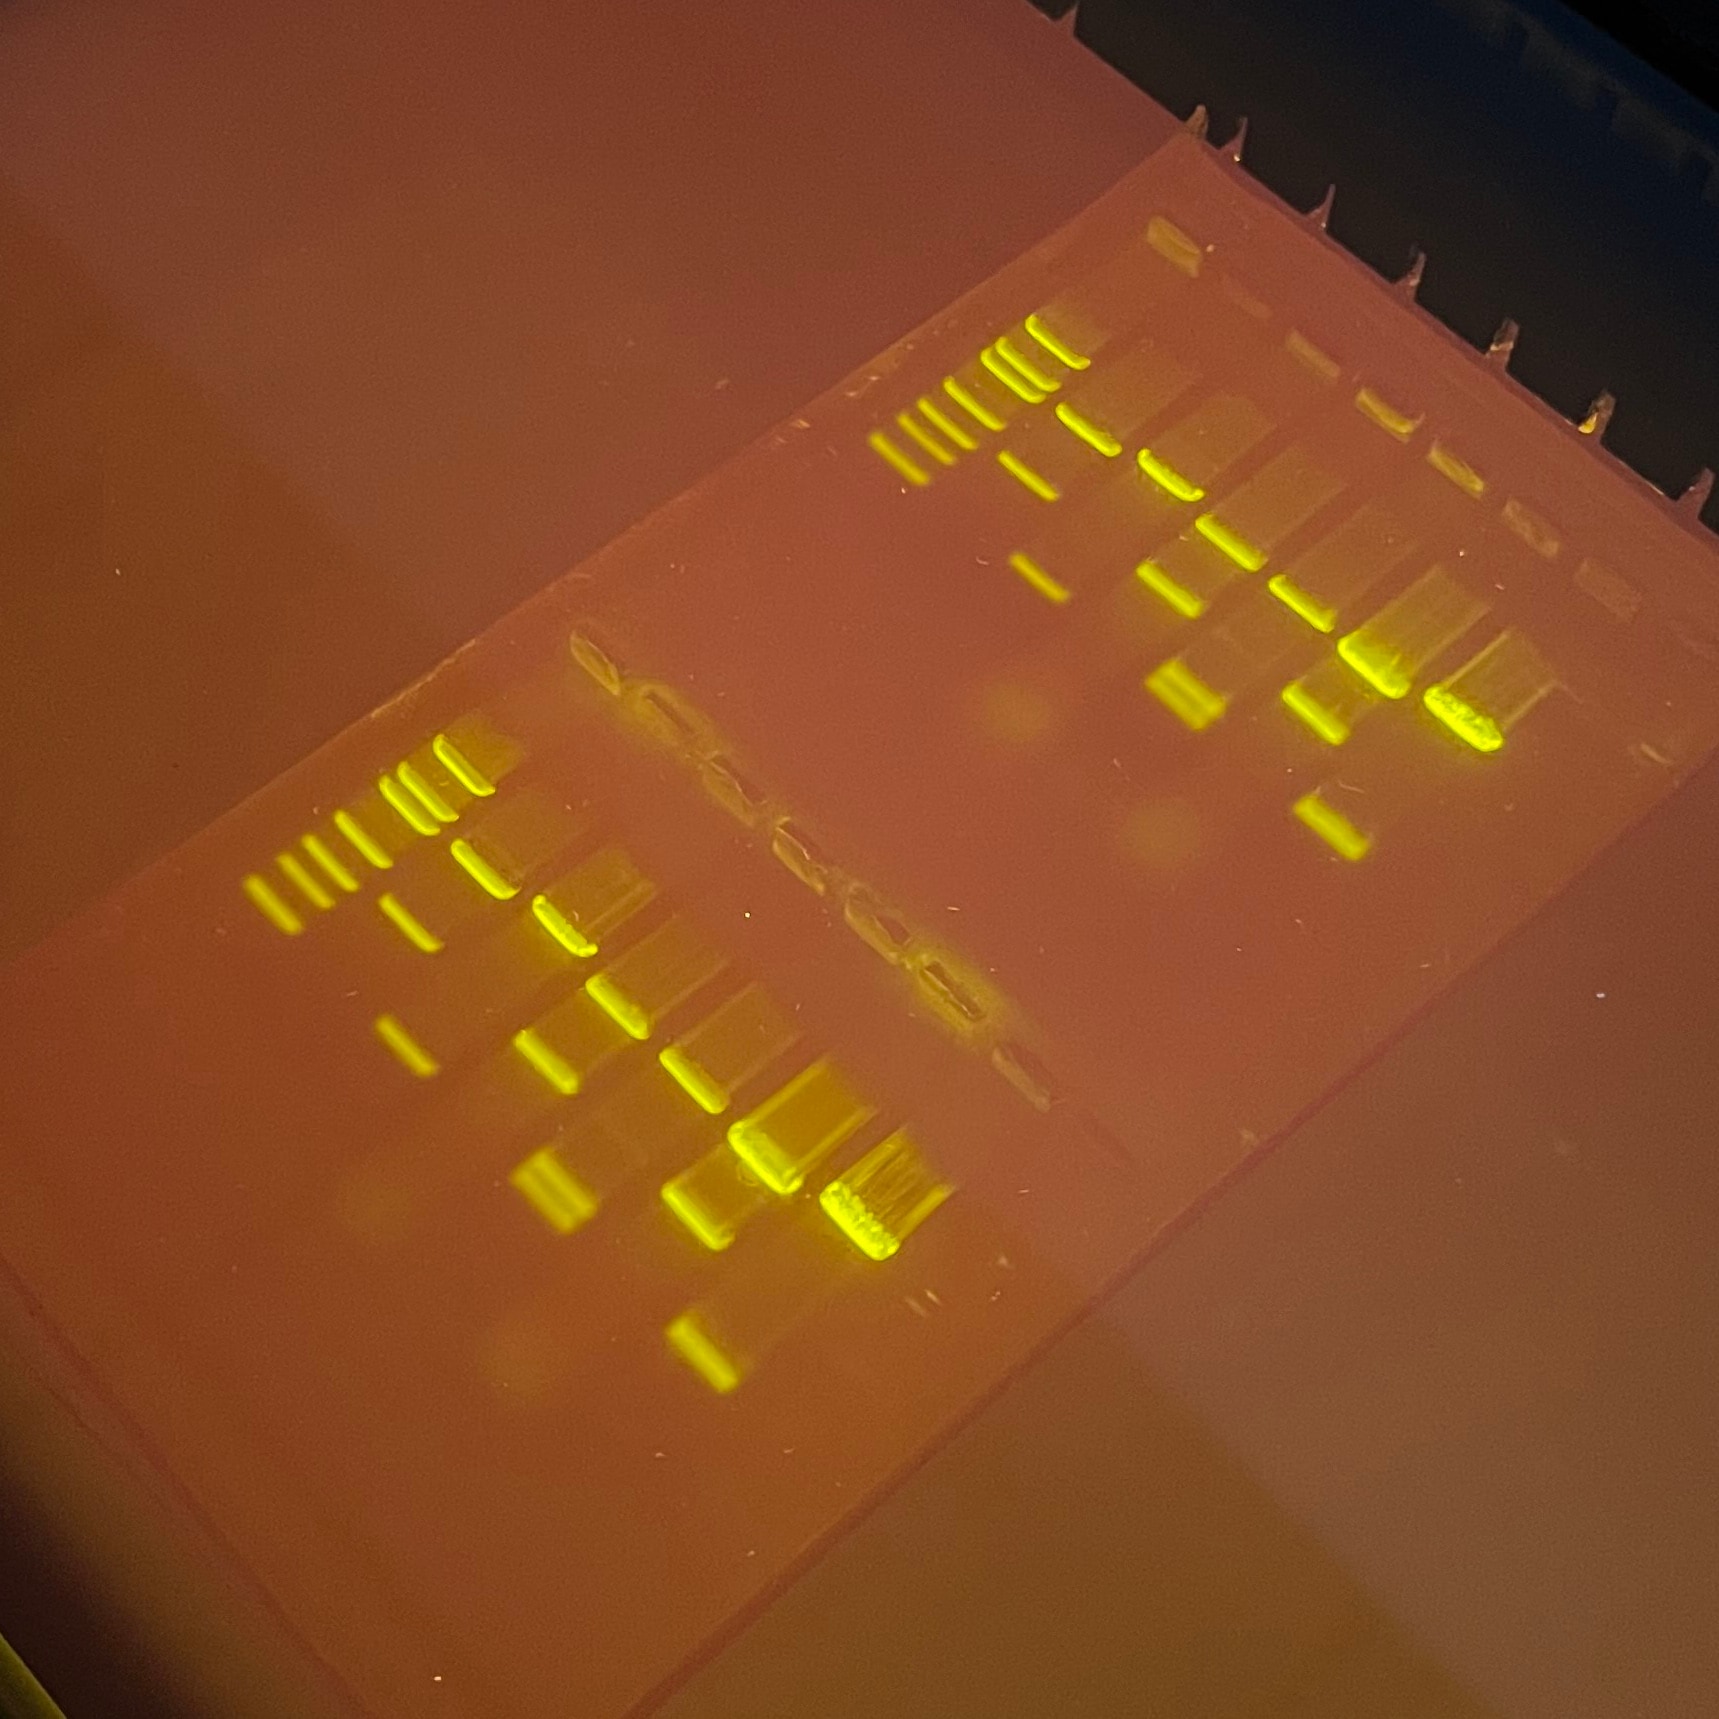
Agarose gel electrophoresis is used to separate mixtures of DNA fragments into discrete bands according to their size. However, since DNA is clear and colorless, the bands cannot be seen with the naked eye. SYBR Safe® is a fluorescent DNA stain that binds specifically to the DNA double helix. When excited with UV or blue light, any SYBR Safe® that is bound to DNA fluoresces with a bright green color.

Fluorescent DNA stains like SYBR Safe® are perfect for technically challenging experiments like PCR because they are extremely sensitive, making it easy to quantify small amounts of DNA. In contrast with other fluorescent stains, SYBR Safe® has been engineered to be non-mutagenic, making it much safer to use in the classroom.

Disposal of SYBR® Safe:

SYBR® Safe DNA Stain is not classified as hazardous waste, thus can be safely disposed of down the drain or in the regular trash, providing convenience and reducing cost in waste disposal.

SYBR® Safe Storage:

Protect from light! Store at room temperature (<20°C) in the dark.

Diluting SYBR® Safe Stain video (Method I, Recommended):


IN-GEL SYBR® SAFE DNA STAINING PROTOCOL (Method I, Recommended)

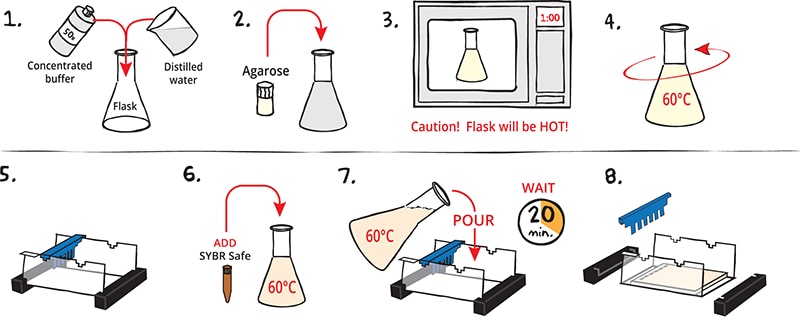
This fast, easy staining protocol incorporates SYBR® Safe into the molten agarose before the gel is poured into the casting tray. This means that the DNA is staining while the electrophoresis experiment is running! Results can be visualized immediately post electrophoresis.

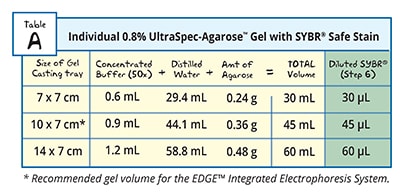
SYBR® Safe is provided as a 10,000X concentrate. Be sure to calculate the amount used for staining before casting the gel. For example, 5 μl of SYBR® Safe is added to 50 ml of molten agarose for DNA visualization.

Agarose gels may be prepared in advance and stored for later use. Place the gels in a plastic container and cover with 1X Electrophoresis Buffer containing SYBR® Safe at a 1:10,000 dilution. Store in the dark at 4° C for up to a week.

Casting the Agarose Gel (Method I, recommended)

  1. 1. DILUTE concentrated (50X) buffer with distilled water to create 1X buffer (See Table A)
  2. 2. MIX agarose powder with 1X buffer in a 250 mL flask (See Table A)
  3. 3. DISSOLVE agarose powder by boiling the solution. MICROWAVE the solution on high for 1 minute. Carefully REMOVE the flask from the microwave and MIX by swirling the flask. Continue to HEAT the solution in 15-second bursts until the agarose is completely dissolved (the solution should be clear like water)
  4. 4. COOL agarose to 60°C with careful swirling to promote even dissipation of heat.
  5. 5. While agarose is cooling, SEAL the ends of the gel-casting tray with the rubber end caps. PLACE the well template (comb) in the appropriate notch.
  6. 6. Before casting the gel, ADD diluted SYBR® Safe to the molten agarose and swirl to mix (See Table A).
  7. 7. POUR the cooled agarose solution into the prepared gel-casating tray. The gel should thoroughly solidify within 20 minutes. The gel will stiffen and become less transparent as it solidifies.
  8. 8. REMOVE end caps and comb. Take particular care when removing the comb to prevent damage to the wells.

PROCEED to Performing Electrophoresis

METHOD II: POST-ELECTROPHORESIS SYBR® SAFE DNA STAINING PROTOCOL

Run agarose gel(s) as usual according to your standard protocol. After the electrophoresis is completed, turn off the power, unplug the power source, disconnect the leads, and remove the cover.

  1. 1. DILUTE SYBR® Safe 1: 10,000 by adding 7.5 μl of the concentrated stain to 75 ml of 1x electrophoresis buffer in a flask. MIX well.
  2. 2. REMOVE the agarose gel and casting tray from the electrophoresis chamber. SLIDE the gel off of the casting tray into a small, clean gel-staining tray.
  3. 3. POUR the 1x SYBR® Safe stain solution over the gel. COVER the gel completely.
  4. 4. COVER the tray with foil to protect the gel from light. STAIN the gel for 10-15 minutes. For best results, use an orbital shaker to gently agitate the gel while staining. REMOVE the gel from the staining solution.
  5. Post-Electrophoresis SYBR® Safe Staining video:


    Visualizing the SYBR® Gel (for both methods)

  1. 1. After electrophoresis is complete, REMOVE the gel and casting tray from the electrophoresis chamber.
  2. 2. SLIDE gel off the casting tray onto the viewing surface of the transilluminator.
  3. 3. Turn the unit on. DNA should appear as bright green bands on a dark background. PHOTOGRAPH results.
  4. 4. REMOVE and DISPOSE of the gel and CLEAN the transilluminator surfaces with distilled water.

Quick Guide Printer-Friendly PDF