What is the difference between accuracy and precision?
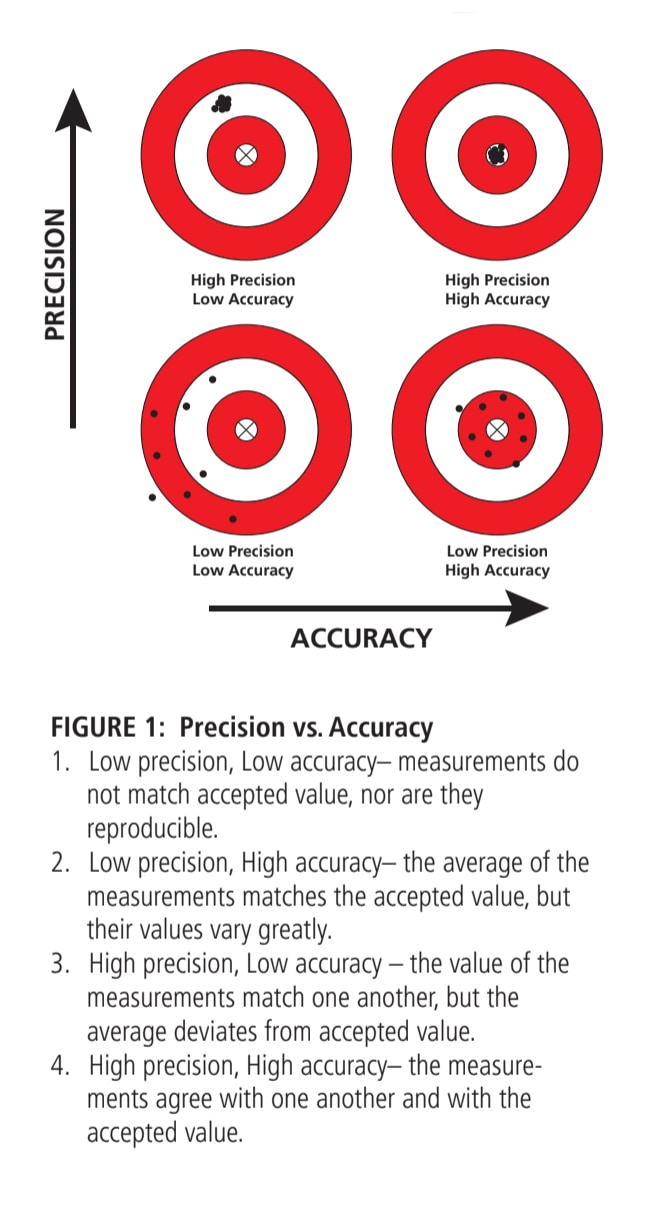
Accuracy describes how close a measurement is to the true value of a given quantity. Precision describes the reproducibility of the measurement. Accordingly measurements can be categorized as follows in Figure 1.
Why are accuracy and precision important for biotechnology?
Accuracy and precision of measurements ensure that your experiments are both successful and reproducible. For example, small differences in primer or template concentration can make a big difference in the results of PCR experiments.
How can we accurately measure small volumes?
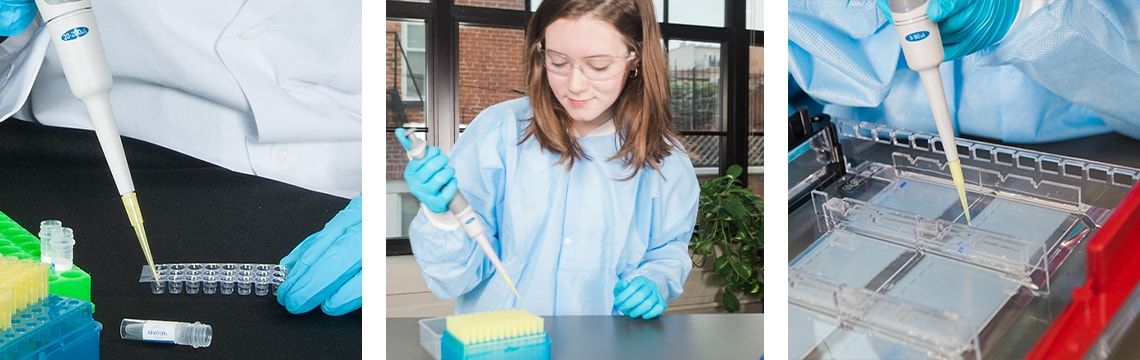
Scientists use carefully calibrated micropipettes to measure small volumes in the laboratory. Micropipettes draw liquid into a disposable plastic tip by creating a vacuum in the barrel above the tip. The liquid is dispensed when the vacuum is released. The plastic tip is changed between samples to prevent cross-contamination.
Setting the Volume of an adjustable volume micropipette:
1. CHOOSE the correct micropipette for the volume you are measuring. Make sure that the volume to be measured DOES NOT EXCEED the upper or lower volume setting of the micropipette.
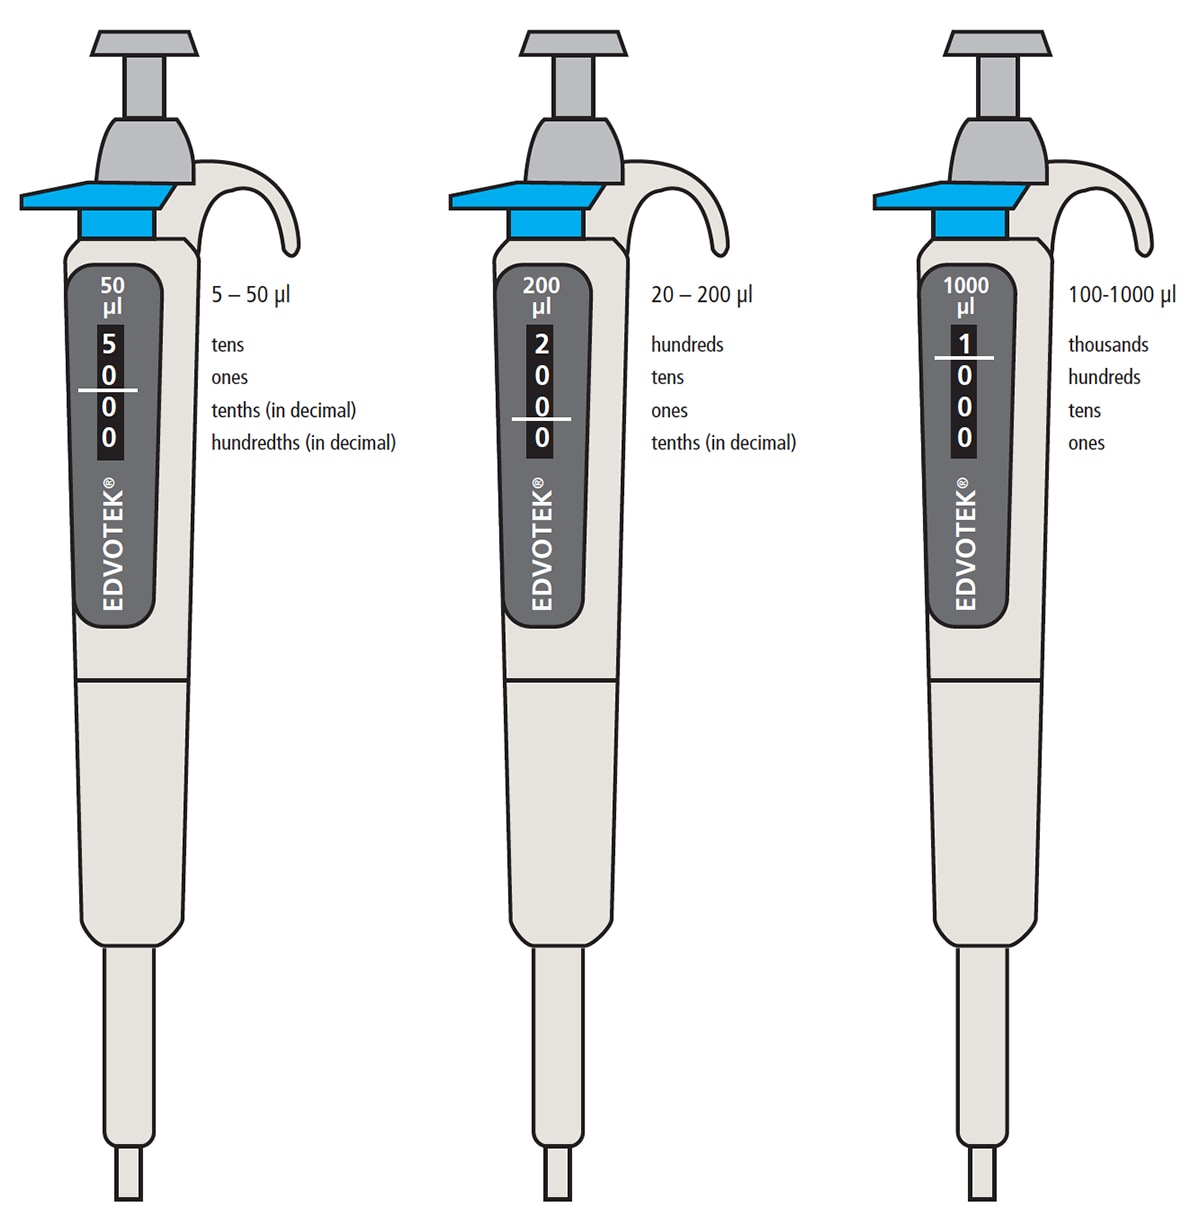
2. DETERMINE the units measured by the micropipette by looking at the volume setting. The setting will appear in the window on the side of the micropipette. Note that the different micropipettes use different scales for their measurements. Some micropipettes are accurate to a tenth of a microliter, while others are accurate to one microliter.
3. SET the volume by twisting the top of the plunger. In general, twisting the plunger clockwise reduces the volume, and twisting the plunger counter clockwise increases the volume.
Measuring Liquids with a Micropipette:
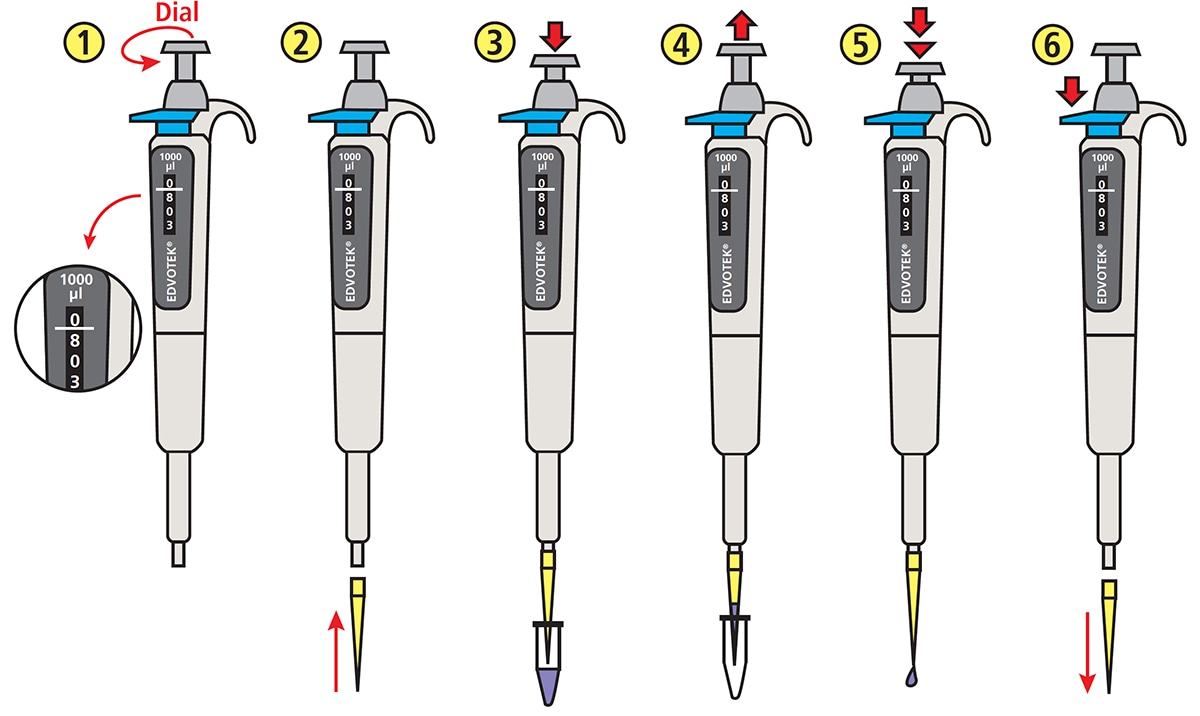
1. SET the micropipette to the appropriate volume by adjusting the dial.
2. PLACE a clean tip on the micropipette.
2. PRESS the plunger down to the first stop. HOLD the plunger down while placing the tip beneath the surface of the liquid.
4. Slowly RELEASE the plunger to draw sample into the pipette tip.
5. DELIVER the sample by slowly pressing the pluger to the first stop. Depress the plunger to the second stop to expel any remaining sample. DO NOT RELEASE the plunger until the tip is out of the sample container.
6. DISCARD the tip by pressing the ejector button. Use a new tip for the next sample.
 Accuracy describes how close a measurement is to the true value of a given quantity. Precision describes the reproducibility of the measurement. Accordingly measurements can be categorized as follows in Figure 1.